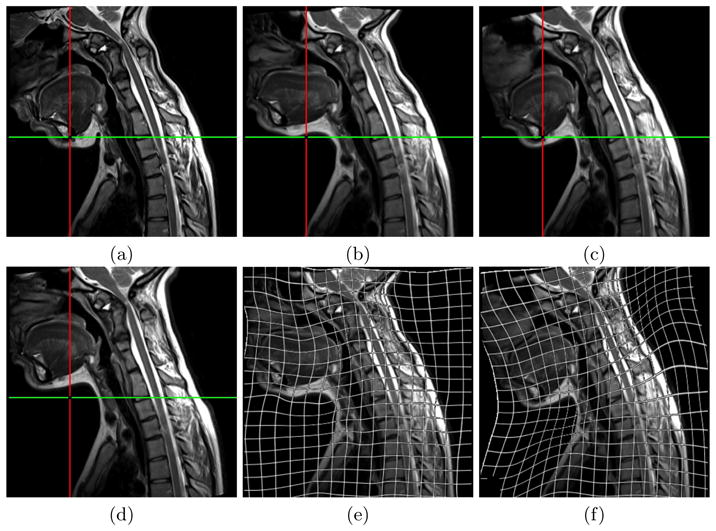
Fig. 2. Registration results on a patient with flexion/neutral positions
(a) reference image; (d,b,c) floating image registered to the reference image with M1, M2, M3 respectively; (e,f) same as (b,c) with deformation grids overlaid. The intersection between the green and red lines shows the large error of M2 on the mandible; on the contrary, M3 correctly matches this point. The ability of M3 to recover the flexion is further illustrated by the deformation grid: the deformation visually appears as near-rigid on the lower head and face, while it shows extension near the back of the neck and contraction near the front of the neck; on the contrary, the deformation grid shows that M2 outputs near rigid movement everywhere.